by Angela Joosse, Aleksandra Kaminska and Shana MacDonald (Members of the L.O.T. Collective)
Mixed media installation
Exhibited August 11-12, 2007
Alley Jaunt: Local Art in Local Garages
Toronto, Ontario, Canada
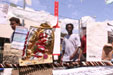
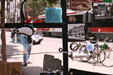
Collect My Junk, a mixed media installation, was presented at Toronto’s
Alley Jaunt festival
public art festival in August of 2007.
This annual festival takes place in the alleyways and garages surrounding Trinity-Bellwoods park, one of the largest open
spaces in Toronto. Collect My Junk was a commissioned to celebrate the fifth anniversary of the festival and was
exhibited in three garage spaces, each one representing a crucial aspect of the collaging and sculptural process.
|
In forming Collect My Junk we set out to create a piece which would speak to and from the Trinity Bellwoods neighbourhood in Toronto, the location where
Alley Jaunt took place each August. As such, the we designed parameters for the project that were aimed at foregrounding a visceral connection with this
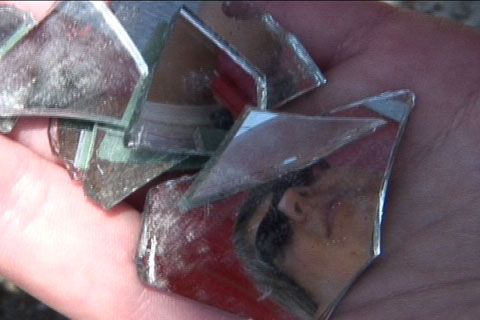
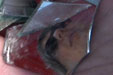
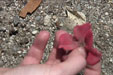
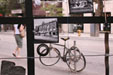
urban space. We began by focusing our attention on discarded things—objects so mundane or dull that they are barely even there/ objects dropped by people
walking by. These lost, or neglected or thrown away objects became the materials out of which we constructed sculptural screens for video projection.
The process of collaging these materials together to make the screens became the content for the videos we projected onto the screens. Through the
process collection, collage and projection, these objects underwent a reversal of several categories of things: disappearance/appearance,
garbage/resource, invisible/visible, abject/aesthetic.
Collect My Junk can generally be described as a process-oriented project involving three phases: collection, collage, and projection/exhibition.
The parameters of this project could be followed and adapted by other collaborators working in other locations. That is to say,
the parameters of this project are aleatory in nature. The parameters of the project involve the following:
1. Collection
1.1 On a given day, walk out into one of the sub-divided areas of the chosen location of study. In making Collect My Junk we chose the day randomly or
according to availability in our schedules.
1.2 Collect whatever lost or discarded objects come to your attention.
1.3 Record on video the process of your hands picking up and examining the objects. We recorded primarily close-up shots of our hands, and we turned
off the camera in between each shot.
1.4 Repeat these actions in each of the other sub-divided areas.
2. Collage
2.1 Return to one of the sub-divided areas with the objects that were collected in that area.
2.2 Spend time compiling a written inventory and description of each object. This involves naming the object and contemplating various categories
which could contain the object. Reflect on the appearance of the object as well as any associations and affective responses you might have.
2.3 Set up a camera with a view of the area where you collected the objects. We used a digital stills camera.
2.4 Set up a piece of plexiglas intersecting the full camera view. The camera will “see” through the plexiglas. We used grip stands (C-stands)
to suspend the plexiglas.
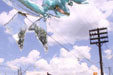
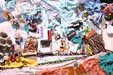
2.5 Collage the found objects onto the plexiglas meanwhile documenting the process on the camera by shooting frames at regular intervals. We used
cordless glue-guns and fishing line to adhere the objects to the plexiglas. Gradually the camera view of the area will disappear behind the collage of
objects on the plexiglas screen.
2.6 Be open to conversations you will likely have with people walking by and consider how their reactions, questions, and idea might inform the piece.
2.7 Repeat this process in each of the sub-divided areas. By the end of this process we had made four collages, each made out of the objects we collected
in our four urban areas: Dundas St., Queen St., Trinity Bellwoods Park, and the alleyways.
3. Projection/Exhibition
3.1 Paint each of the collages white. Only paint the side which contains the objects; on the other side the objects will still be somewhat visible
through the plexiglas. Through this process the collages are transformed into screens ready for image projection.
3.2 Create a video or film loop out of each of the series of still images which document the creation of each of the collage/screens. Make one loop for
each of the sub-divided areas. Thus for Collect My Junk we ended up with four video loops.
3.3 Assemble the video footage which was shot during the collection phase into a split-screen composite. Do not edit the footage. For Collect My Junk,
we split the screen into four showing the footage from of each collection area: Queen, Alley, Park, Dundas
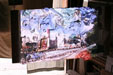
3.4 Hang the collage/screens in your exhibition space. Project the video or film loops onto these screens, aligning the images of the objects with the
actual collaged objects (which, of course, have been painted white) as closely as you like.
3.5 Project the split/screen footage onto a plain white surface. In the case of Collect My Junk we projected this footage onto the white sheet that
we used to organize the found objects as we created our inventory list for each area.
3.6 Post a printed copy of the complete inventory list of junk/found objects you compiled in making the project.
4. Final Instructions
4.1 As people move through the exhibition space they should first encounter the split-screen collection projection, then the inventory of objects,
and then the collage-screen projections.
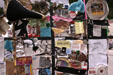
4.2 In the Collect My Junk exhibit we also included something called a “tangents” board. This is a graphic display of the different associative
though tangents that the experience of finding and collaging these objects provoked for us. These tangents also chart out how the different collections
of found objects describe or relate to the urban areas in which they were found. Anyone who follows this project recipe is encouraged to do something similar—something which incorporates a reflection on the experience of the visceral contact with the found objects and the particular location of working.
4.3 This project will take at least ten working days to complete. We spent many more days than that since we also spent a number of days designing the
parameters for the project as well as reflecting on our experience of making the piece.
|